esieabot-ai

esieabot-ai is an optional library that makes it easy to use image recognition functions on your esieabot. Currently, it can:
Detect color circles
Detect and locate ArUco markers
ArUco marker
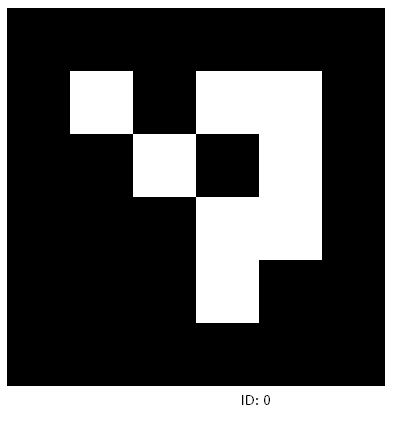
ArUco markers are simplistic markers used in augmented reality applications. Each marker represents a number, in this case esieabot-ai recognizes 4 by 4 ArUco markers, covering numbers from 0 to 250. Thanks to image processing, the position and orientation angle of the markers is recognized. This makes it possible to geolocate the esieabot in space using only its camera. You can generate markers on this site: https://chev.me/arucogen/.
Installation
First, you need to connect the camera to your Raspberry Pi. To do this, follow these instructions:
Warning
You must turn off your Raspberry Pi before connecting the camera. If you do not, you will damage the camera.
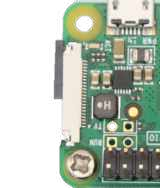
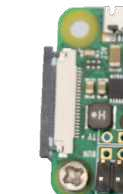
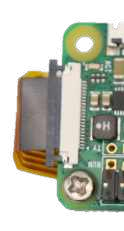
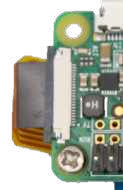
Connect the camera by gently pulling out the black part of the connector, insert the cable as shown, and put the black part back in place. Do the same on the camera side if it is not already done. The black side of the cable should face the camera sensor.
To install esieabot-ai, run the following command: sudo apt install esieabot-ai-api.
Note
esieabot-ai-api cannot run in parallel with another application using the camera, such as esieabot-webcamera which will be uninstalled automatically.
Test
Testing color circle detection
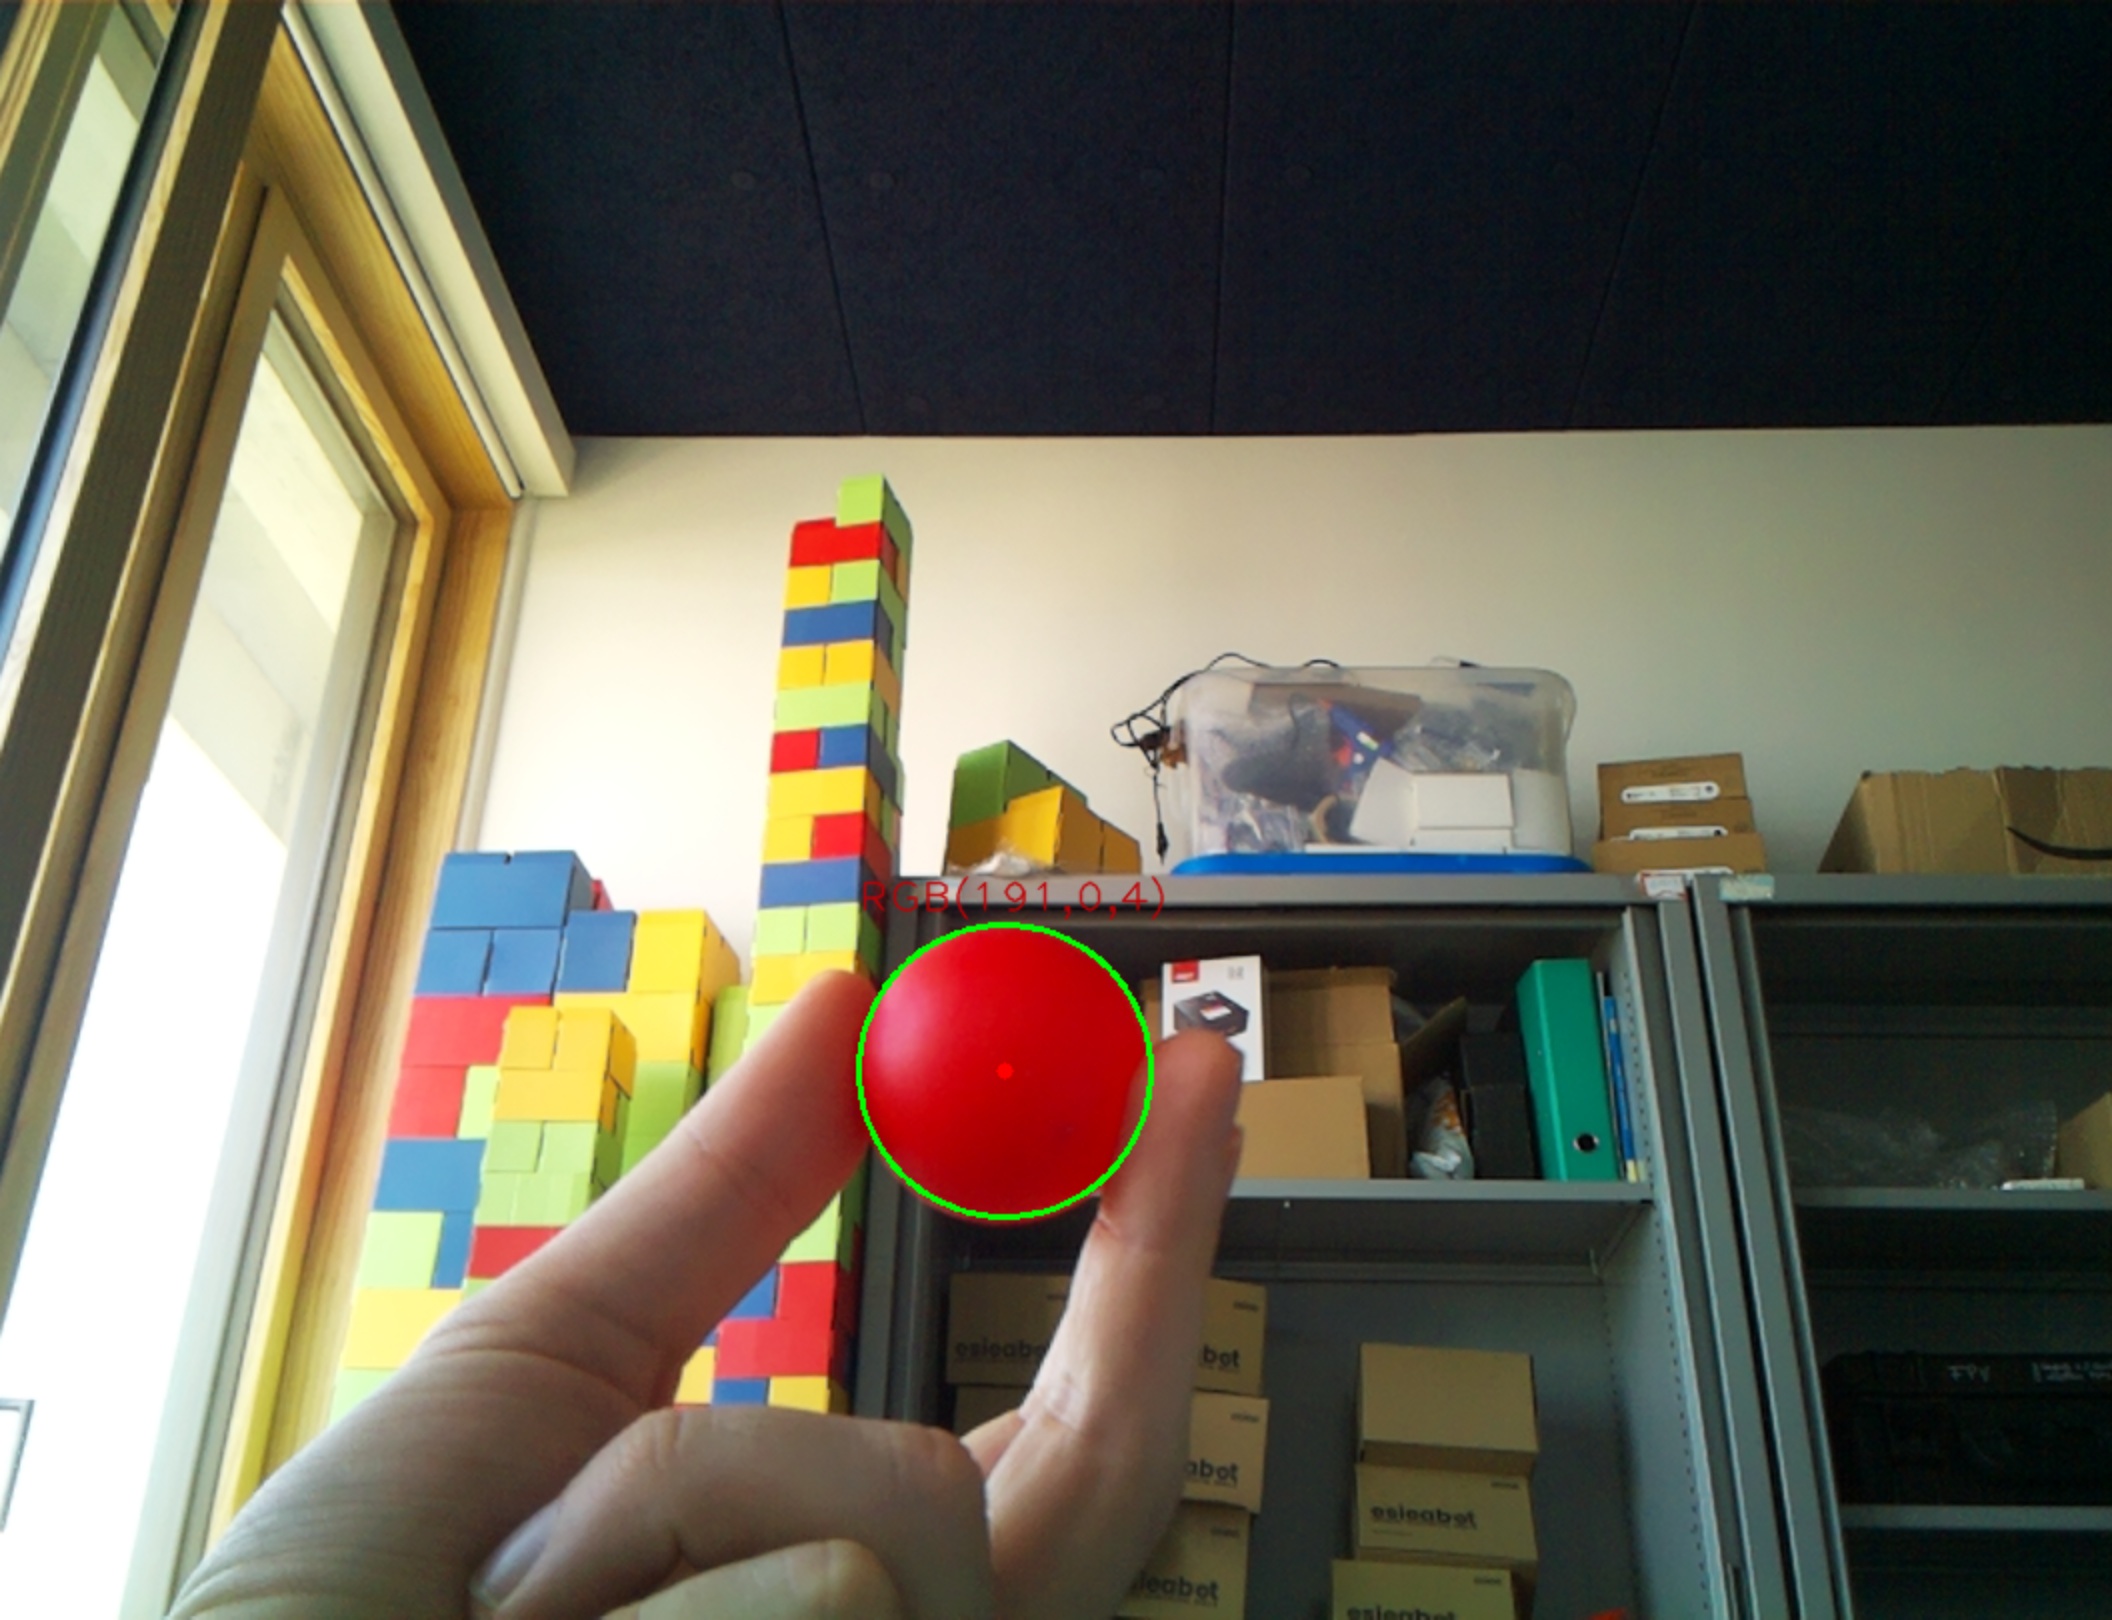
You can test image recognition by accessing the following address from your web browser: http://<address_of_your_esieabot>/ai/get_circle?r=255&g=0&b=0&tolerance=30 (be careful to include the second line)
In the URL, the r, g and b parameters correspond to the color of the circle you want to detect. For example, for a green circle, you can set r=0, g=255 and b=0. The values of r, g and b must be between 0 and 255.
In the URL, the tolerance parameter corresponds to the color detection tolerance. The higher it is, the more circles that are not exactly the requested color will be detected. However, this may also cause objects of a different color to be detected. The value of tolerance must be between 0 and 255. You will need to run tests to find the parameters that best suit your use case.
To help you find the right parameters, you will see the RGB values of the circle detected in the image. You should try different lights and angles to find the best parameters for your use case.
Testing ArUco marker detection
You can test image recognition by accessing the following address from your web browser: http://<address_of_your_esieabot>/ai/get_image
Note
Your esieabot’s address is its IP address, which you can obtain with the command ip a. If you’re connected to its hotspot, the address is always 10.42.0.1. Otherwise, you’ll need to look up the ip address of your robot on your network. If you have an esieabot with a screen, you can also find the address on the screen.
To find out which ArUco markers are detected, open the following page: http://<address_of_your_esieabot>/ai/get_markers. By default, you will get information for markers with a side length of 51mm. If you want to specify a different size, you must add “?marker_size_mm=” followed by the marker size in millimeters at the end of the URL.
Warning
It is not possible to use the get_image function and the other detection functions at the same time. So you can’t display what the camera sees and at the same time request the list of markers or circles.
Note
It takes about 150ms (on Raspberry Pi Zero 2W) or 300ms (on Raspberry Pi Zero W) to process a full image. You should take into account in your programs that processing is not instantaneous.
Debugging
If the tests don’t work, you can go to the /esieabot/logs folder to find a esieabot-ai-api.py.log file. This file contains error messages which may be of interest to you. If it doesn’t exist, esieabot-ai hasn’t been installed correctly. In any case, if the application doesn’t work, it’s probably because you have another application monopolizing the camera.
If image recognition doesn’t work, you can run the command libcamera-still --list-cameras to see if the camera is recognized by the system.
Use in C
Color circle detection
You can use the esieabot-ai library to find a color circle directly in a C program like this:
#include "esieabot-ai.h"
#include <stdio.h>
#include <stdlib.h>

int main() {
    while (1) { // Infinite loop of the program
        struct circle *c = get_circle(255, 0, 0, 30); // Search for a red circle with a tolerance of +/- 30
        if (c->found) // If a circle was found...
            printf("Red circle found: x=%d y=%d diameter=%dpx\n", c->x, c->y, c->diameter);
        free(c);
    }
    return 0;
}
This simple program loops to query esieabot-ai to detect a circle matching the specified criteria. To compile it, add -lesieabot-ai -lcurl to the compile command.
ArUco marker detection
You can use the esieabot-ai library to find ArUco markers directly in a C program like this:
#include "esieabot-ai.h"
#include <stdio.h>
#include <stdlib.h>

int main() {
    while (1) { // Infinite loop of the program
        struct marker *markers = get_markers(51); // Retrieve markers with 51mm side length (change according to your markers!)
        struct marker *m;
        for (m = markers; m->id != -1; m++) { // For all found markers...
            printf("Marker found: number %d at %dcm distance. x=%d y=%d\n", m->id, m->z, m->x, m->y);
        }
    }
    return 0;
}
This simple program loops to query esieabot-ai to retrieve the list of markers as an array and iterate through it. To compile it, add -lesieabot-ai -lcurl to the compile command.
Use in Python
You can also use the esieabot-ai library in python. However, you will have to make a request yourself. To do this, you must first import the requests library.
import requests

# Search for a red circle with a tolerance of +/- 30
response = requests.get('http://127.0.0.1:5001/get_circle?r=255&g=0&b=0&tolerance=30').json()

if response["found"]:
    print("Red circle found: x={} y={} diameter={}px".format(response["x"], response["y"], response["diameter"]))
This program makes a request to find a red circle with a tolerance of +/- 30. If a circle is found, information about it is displayed.
import requests
import math

# 51mm marker size. You must change this value to the size of your markers.
response = requests.get('http://127.0.0.1:5001/get_markers?marker_size_mm=51').json()

for marker in response["markers"]:
    distance = math.sqrt(marker["x"] ** 2 + marker["y"] ** 2 + marker["z"] ** 2)
    print("Marker found: number {} at {}cm distance. x={} y={} z={}".format(marker["id"], distance, marker["x"], marker["y"], marker["z"]))
This program will, as in the C example, retrieve the list of markers, but in the form of a dictionary. The program will thus iterate in it for each element.
Structures
circleis a structure containing the following fields:int foundis 1 if a circle was found, 0 otherwiseint xis the circle’s position on the X axis in pixelsint yis the circle’s position on the Y axis in pixelsint diameteris the circle’s diameter in pixels
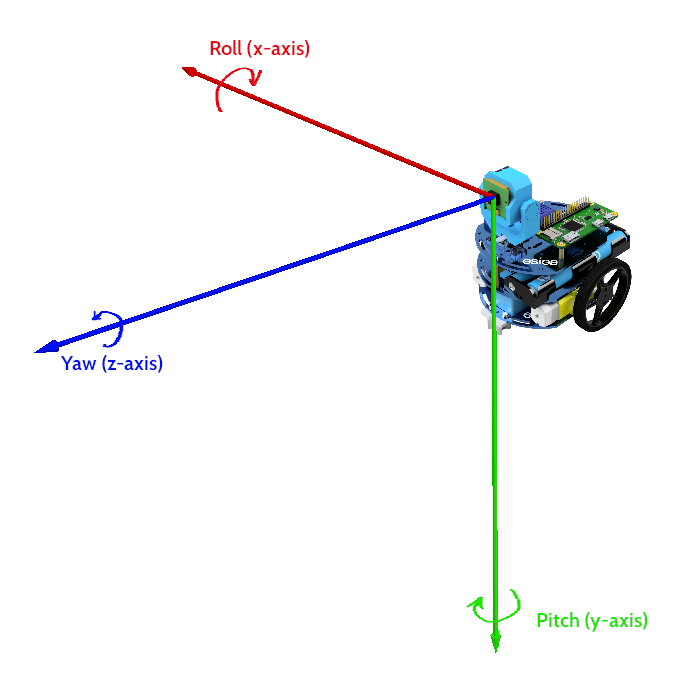
markeris a structure containing the following fields:int idis the marker idint xis its position on the X axis in cmint yis its position on the Y axis in cmint zis its position on the Z axis in cmint pitchis its rotation (pitch axis) in degreesint rollis its rotation (roll axis) in degreesint yawis its rotation (yaw axis) in degrees
Angles are returned in degrees, between -180 and 180.
Note
A marker aligned perpendicular to the camera will have a roll of 180° but a pitch and yaw of 0°
Orientation